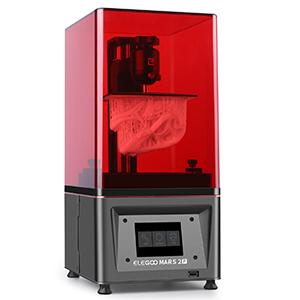
The Elegoo Mars 2 Pro is a resin-based, SLA (stereolithography) 3D printer. Instead of using plastic filament that extrudes out of a nozzle, the Elegoo Mars 2 Pro holds a vat of liquid resin and uses an LCD screen to selectively harden small layers of resin.
Difficulty
Moderate
Requires Instruction?
Yes
Specifications
-
Build volume: 129 x 80 x 160 mm (5.08 x 3.15 x 6.30 inches)
-
Up to 10 micron (0.01 mm) layer resolution
-
Build speed up to 50 mm/hr
-
Light source: 405 nm UV light
What you should know
How to Set Up a Print
Transfer your model
- Email your model to gtownmakerhub@gmail.com.
- Download your model onto the computer and open it in Chitubox.
Arrange your model and choose the appropriate settings
- Check for comments on the bottom-left of the screen and click on the blue text.
- Click on the “Move” button (left of the screen), then press the “Center” and “Put on the Plate” buttons.
- Rotate your model with the “Rotate” button so that the bottom of the model is on the build plate.
- Press the button on the top-right of the screen that looks like a plate on top of 3 bullets. These are the support settings.
- Choose either “Light”, “Medium”, or “Heavy” (The lighter the support, the less resin used).
- If your model has overhangs larger than 45-degrees, you may need to use supports. Press “+All” at the bottom-right to automatically add supports to your print.
- Press the button with a gear on it on the top-right of the screen to go back to the original view
- Press the big blue “Slice” button on the bottom-right
Start your print!
- Take the USB drive from the Elegoo and then save your file onto “Prints”. Then insert it into the 3D printer.
- WEAR APPROPRIATELY SIZED GLOVES AND EYE PROTECTION. The SLA resin is irritating to skin and very harmful to your eyes. Avoid direct contact with any uncured resin.
- Fill the reservoir at the base of the SLA printer. Do not fill above the “MAX” line.
- Start the print
- Press “Print”
- Use the arrows to find your print
- Press the “Play” Button
- The build plate should lower into the resin and the print should begin.
Fill out the 3D Printing Log
- Use the information provided during the saving process to complete the 3D printing log. The log will ask you for the 3D print time and the amount of material used in milliliters (ml).
- PLA - the filament most commonly used by the FDM printers
- PVA - the water soluble support material used in the Ultimaker 3’s and the Ultimaker S3.
- Resin - the material used in the SLA printers.
Clean and Cure your print
- After your print has finished, it will still be covered in toxic, uncured resin. While wearing gloves and eye protection, remove the build plate from the 3D printer by loosening the hand screw at the top of the build plate. The build plate can then be slid off the front of the printer.
- Use a scraper to carefully remove the print from the build plate. The model is very fragile at this stage, so go slowly and take your time. Be careful not to cut yourself with the scraper. It is sharp!
- Wash the print in the alcohol bath for 10 minutes. This removes any excess resin.
- Break off any supports that are easy to access
- Cure the print by placing it in the curing station at the required settings. For the Elegoo printer, those are:
- Temp: 60 degrees C
- Time: 5 minutes